Provision your business idea 💡, innovation or prototype into web application.
Provision complete cloud infrastructure with isolated development, staging and production environments for each Project in just few clicks, steps and minutes.
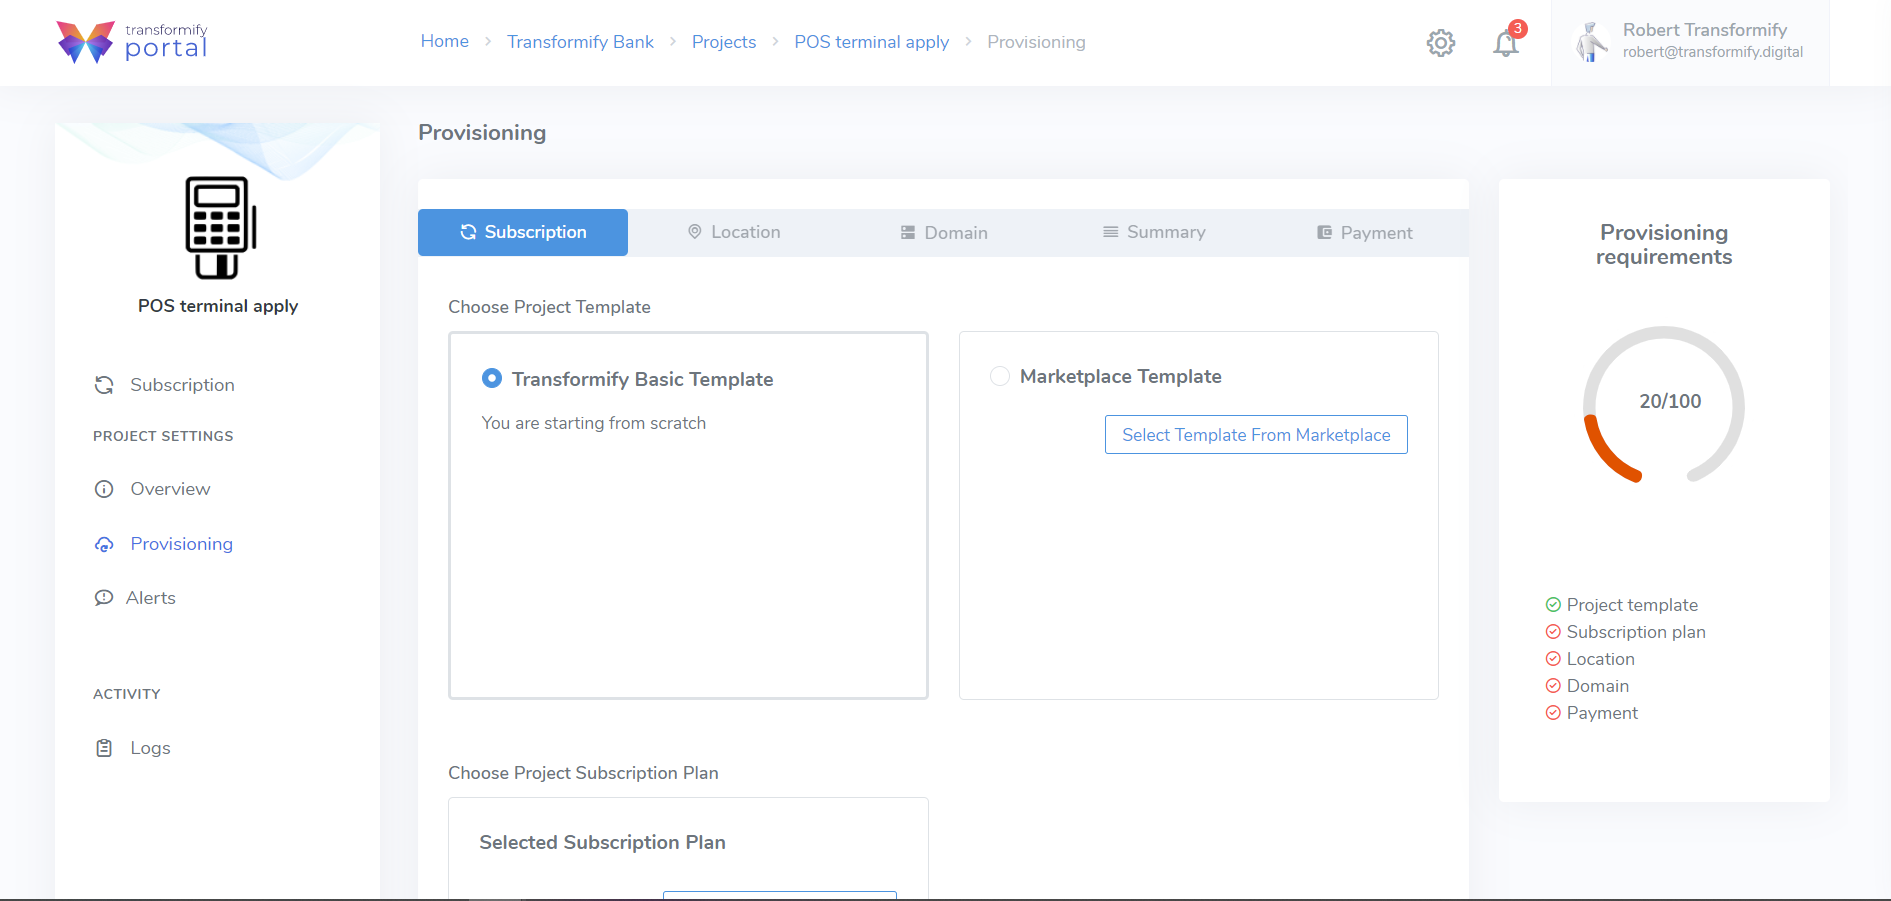
The provisioning wizard will guide you through the necessary steps to set all mandatory project parameters, by answering the logic questions.
- Select subscription plan,
- Choose the starting point of your Project's development. Start from scratch of buy ready-made SaaS Solution template from the Marketplace.
- Determine data residency location from available Azure data regions, to provision the project.
- Preview summary of all set parameters before you continue to the final step,
- Payment.
Step 1: Subscription
Determine your project's development starting point. Do you want to:
- start from scratch, by selecting the option Transformify basic template, or
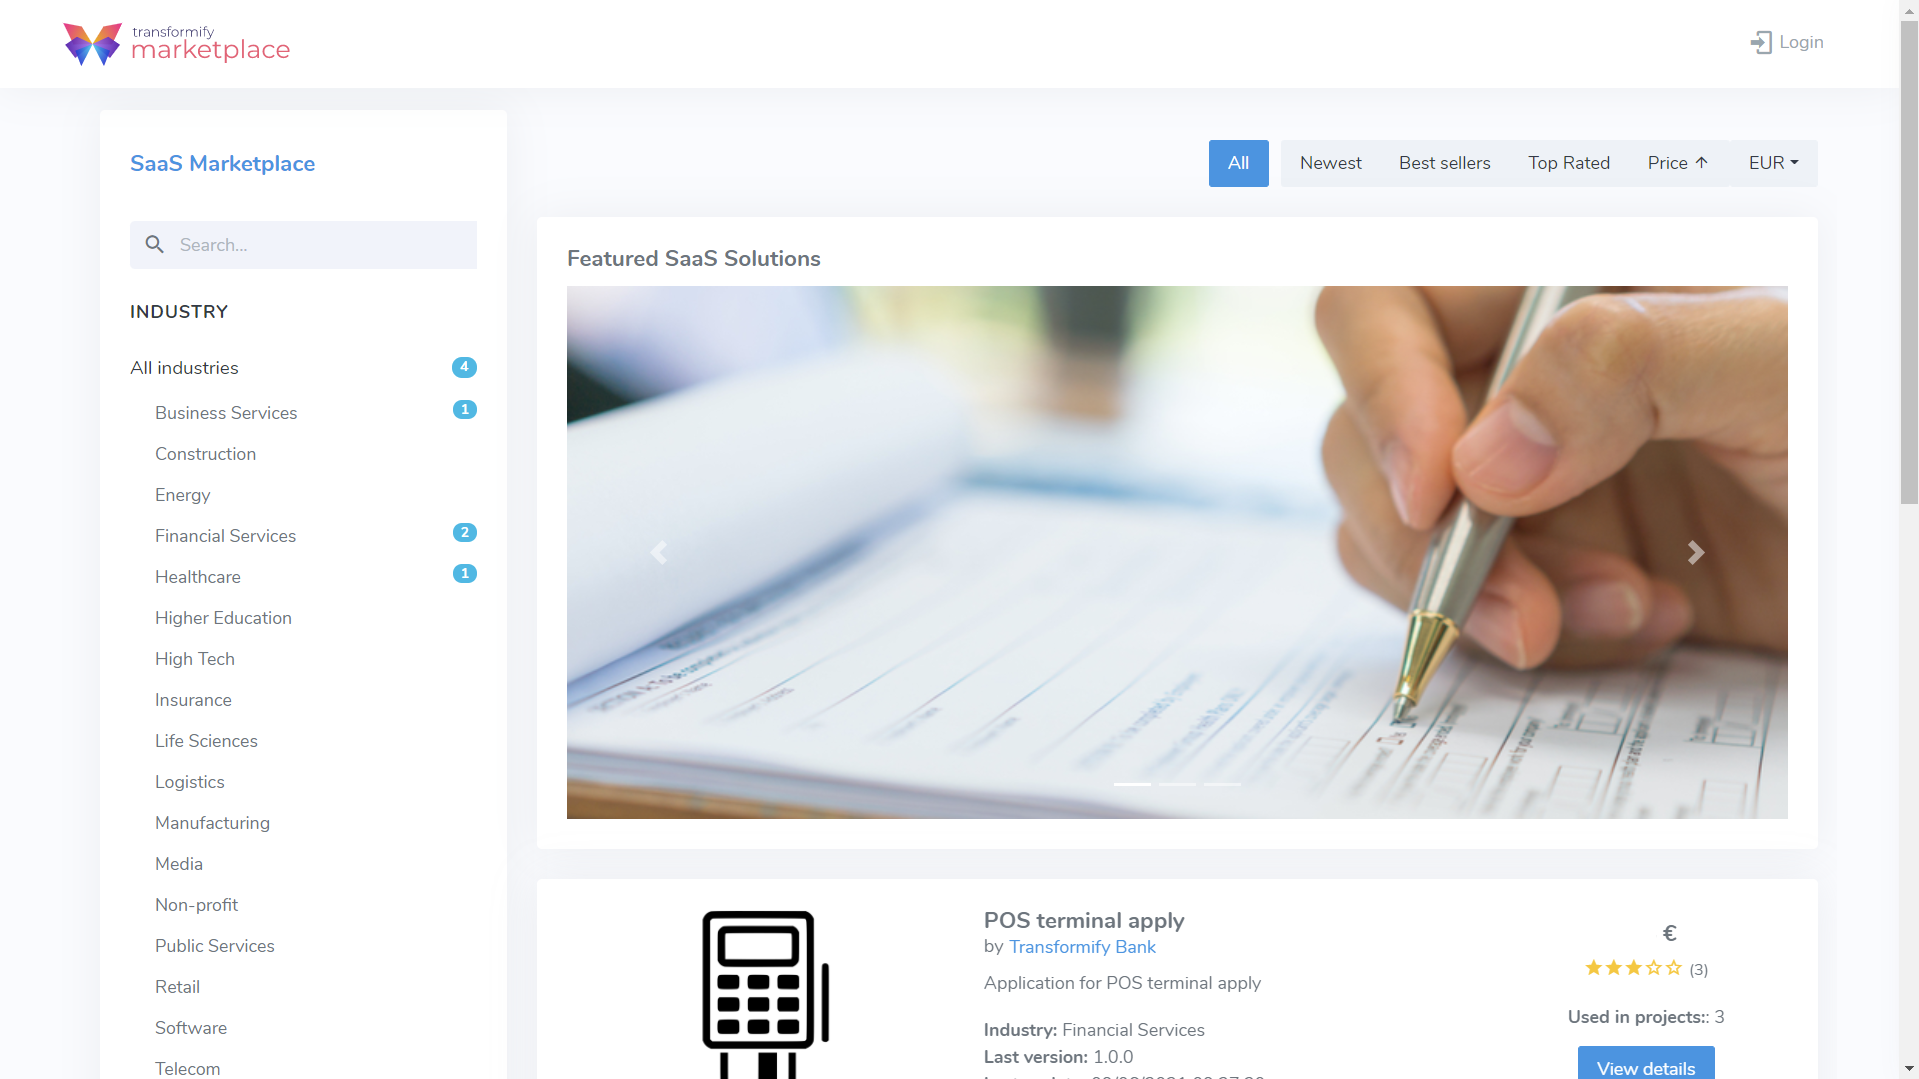
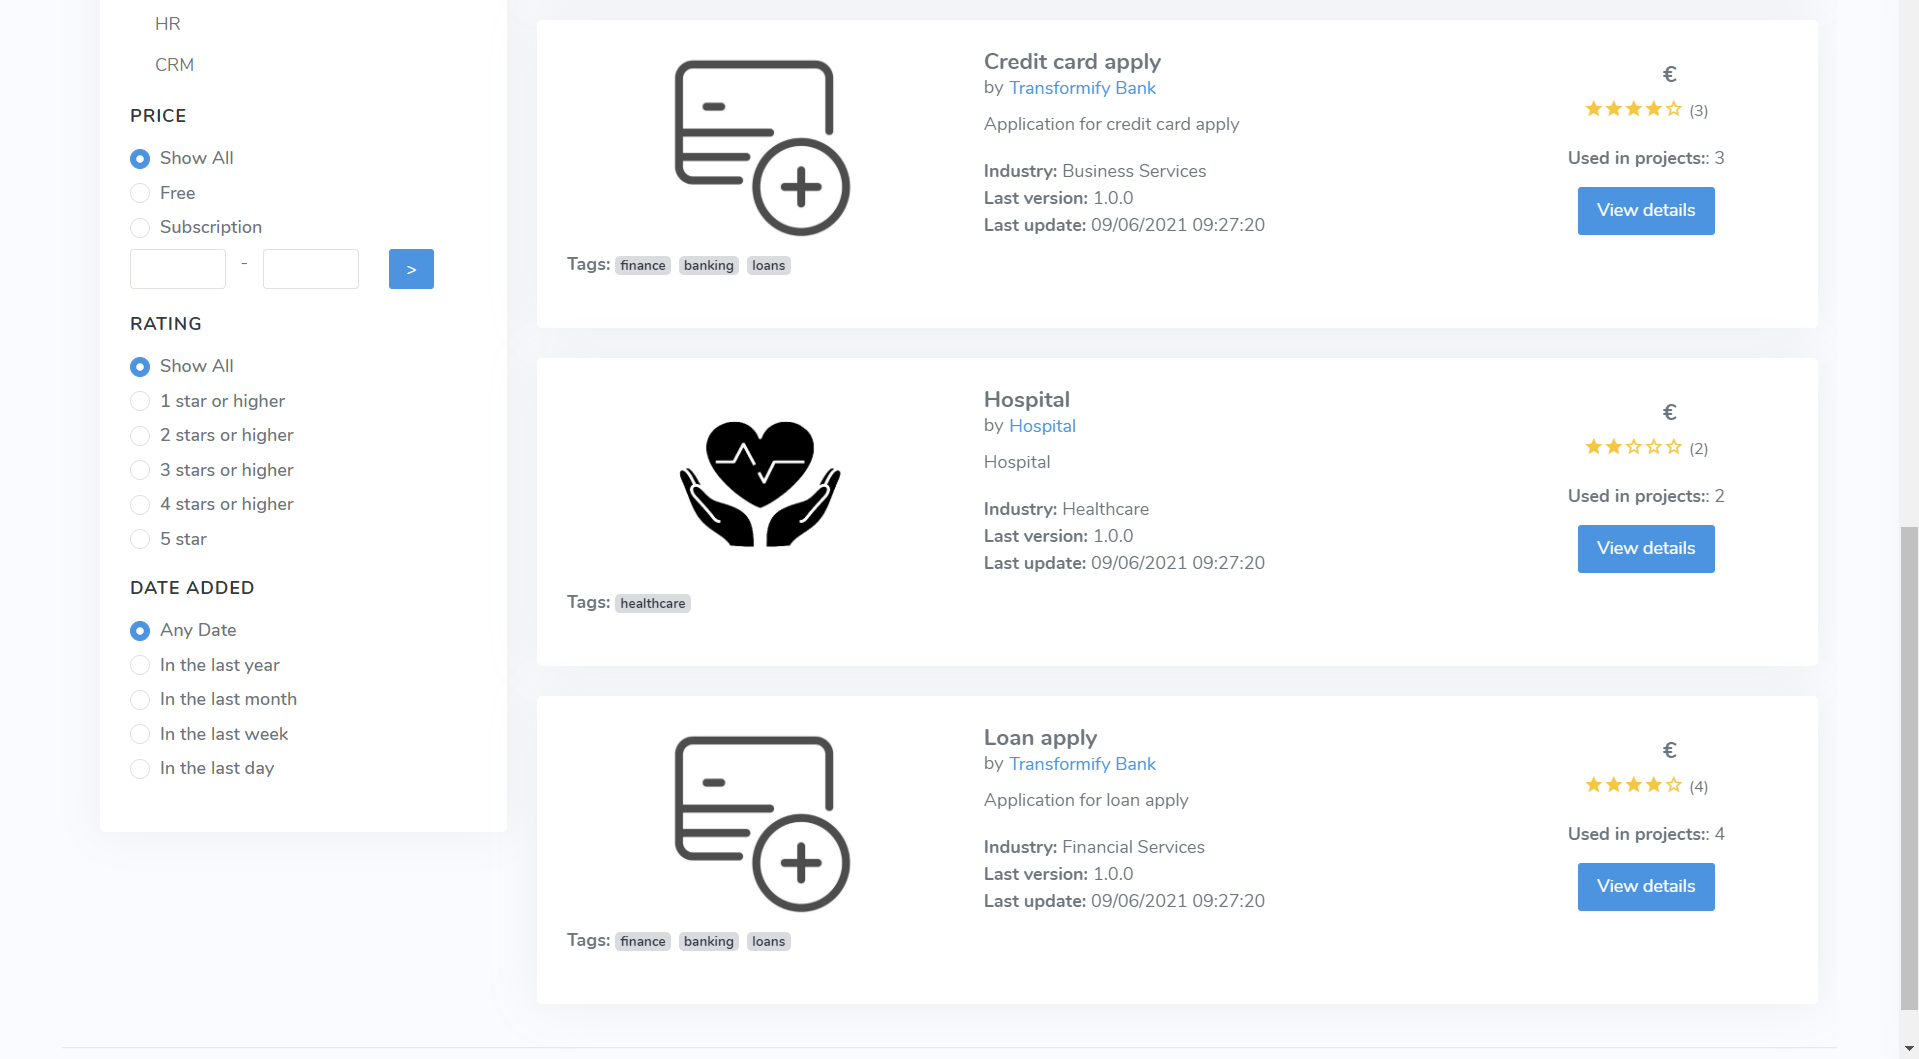
- browse, find and purchase (subscribe) ready-made SaaS Solution, from the catalogue on our SaaS Marketplace, that you will provision as your Project. Use it as-is, or further modify and customize to own business needs. Have in mind that this modified version is for own business use only, and can't be re-published on the SaaS Marketplace as your solution!
You subscribe for the purchased SaaS Solution. It represents monthly recurring type of cost. In your invoice you will have two items and be charged for:
Subscription plan for the Project + Subscription pan for the SaaS Solution (as add-on).
Subscription plan
Selecting the right PAID subscription plan is very important as they include different levels of capacity and premium features. Below the cards displaying the prices, please find and carefully read the comparison table of the subscription plans, what they include, and conduct an analysis of your required technical/business needs.
Of course, there is the option to upgrade at any time or downgrade your plan, but there're certain preconditions to be met for this to be feasible (for more detailed information, read here).
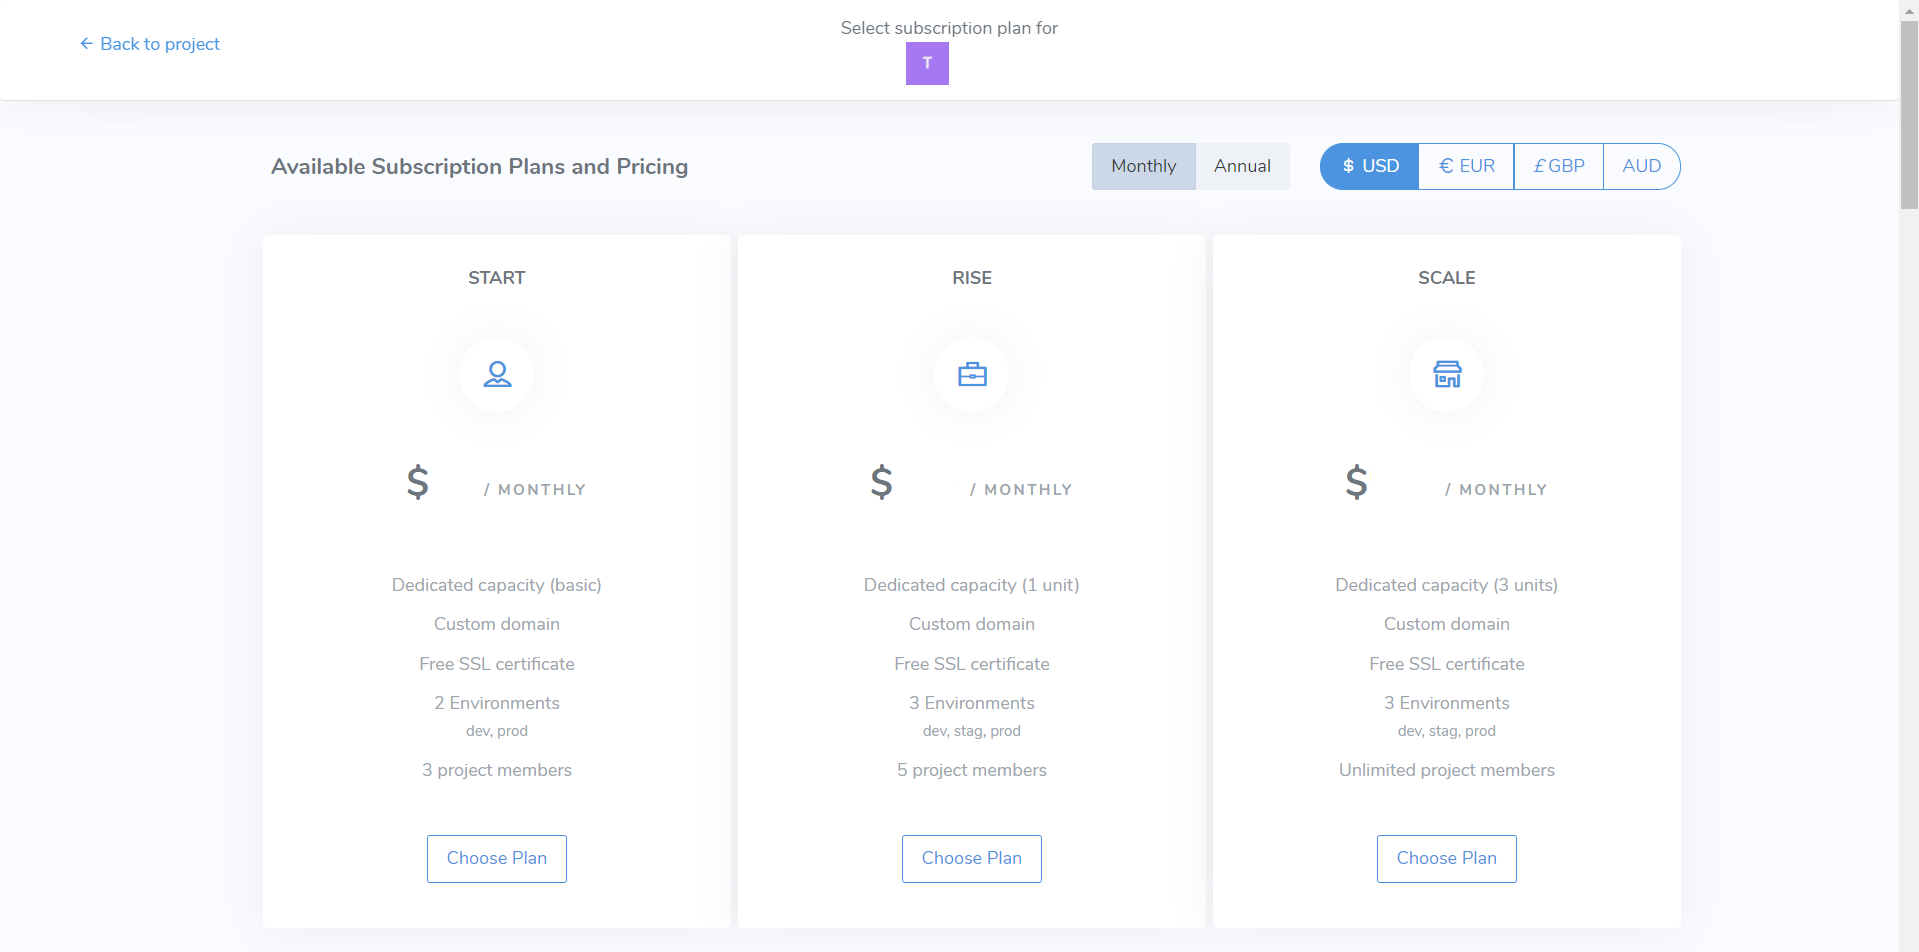
If the organization Owner or Admin enables this organization policy, then you will have the option to select only from the allowed subscription plans. For more details on organization policies, read here.
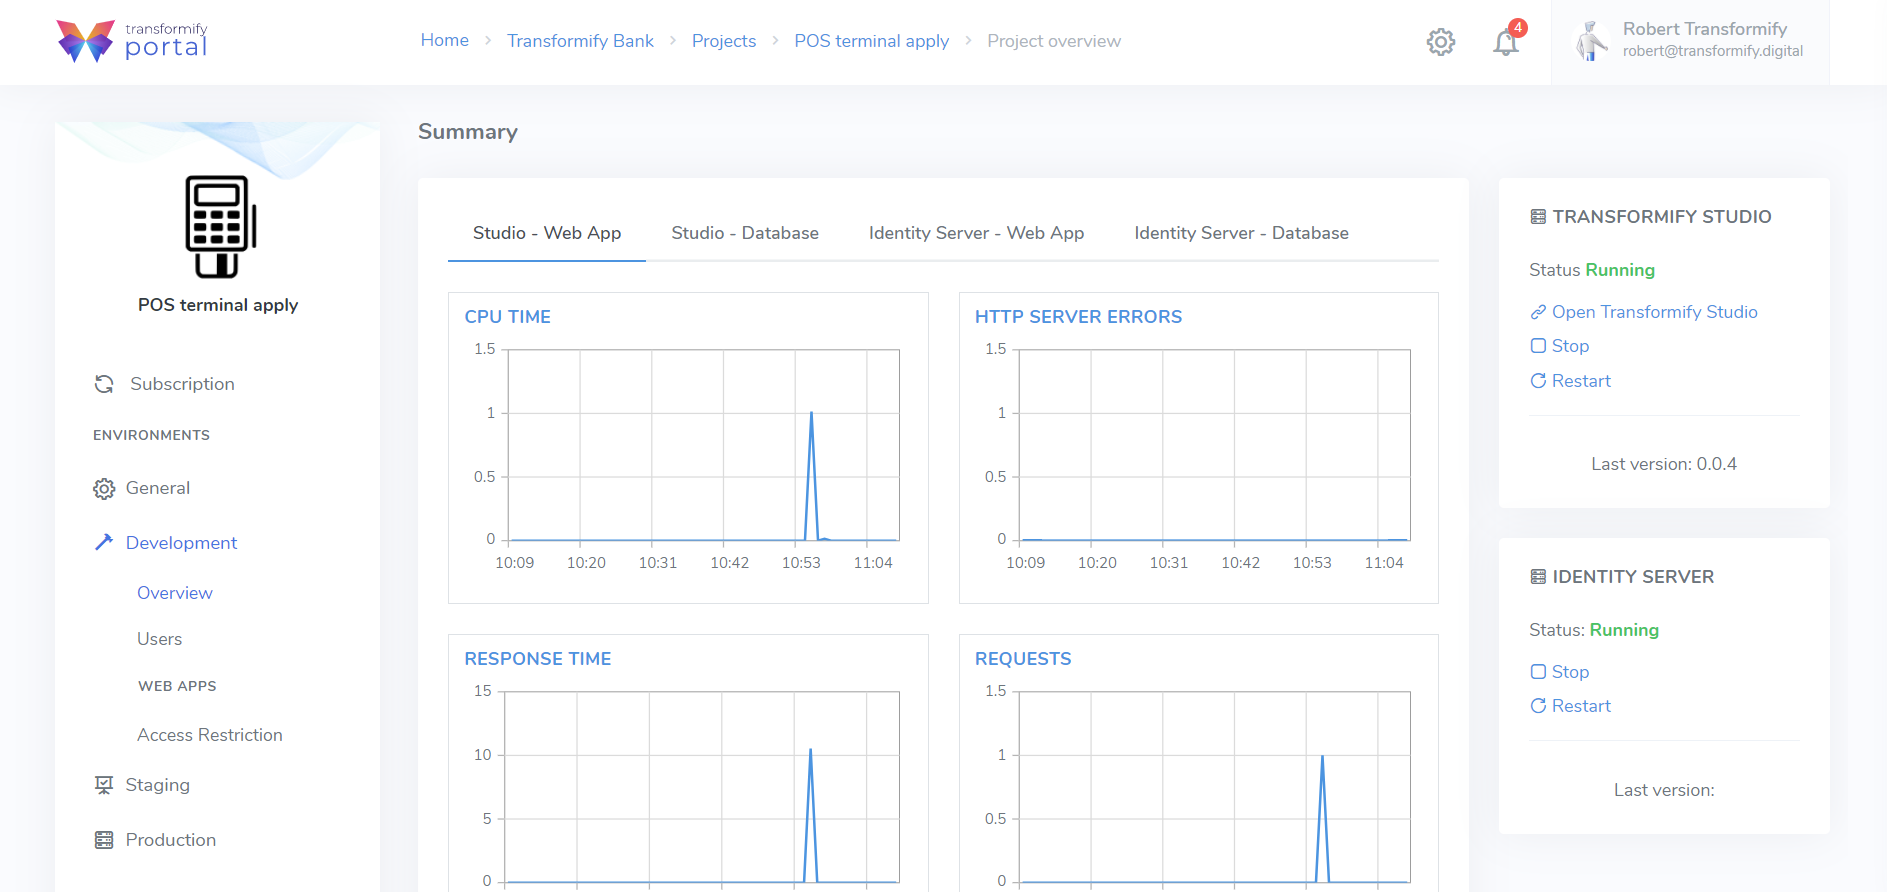
As you advance with the Project's provisioning set-up, you can visually see your progress and the completion status of each requirement.
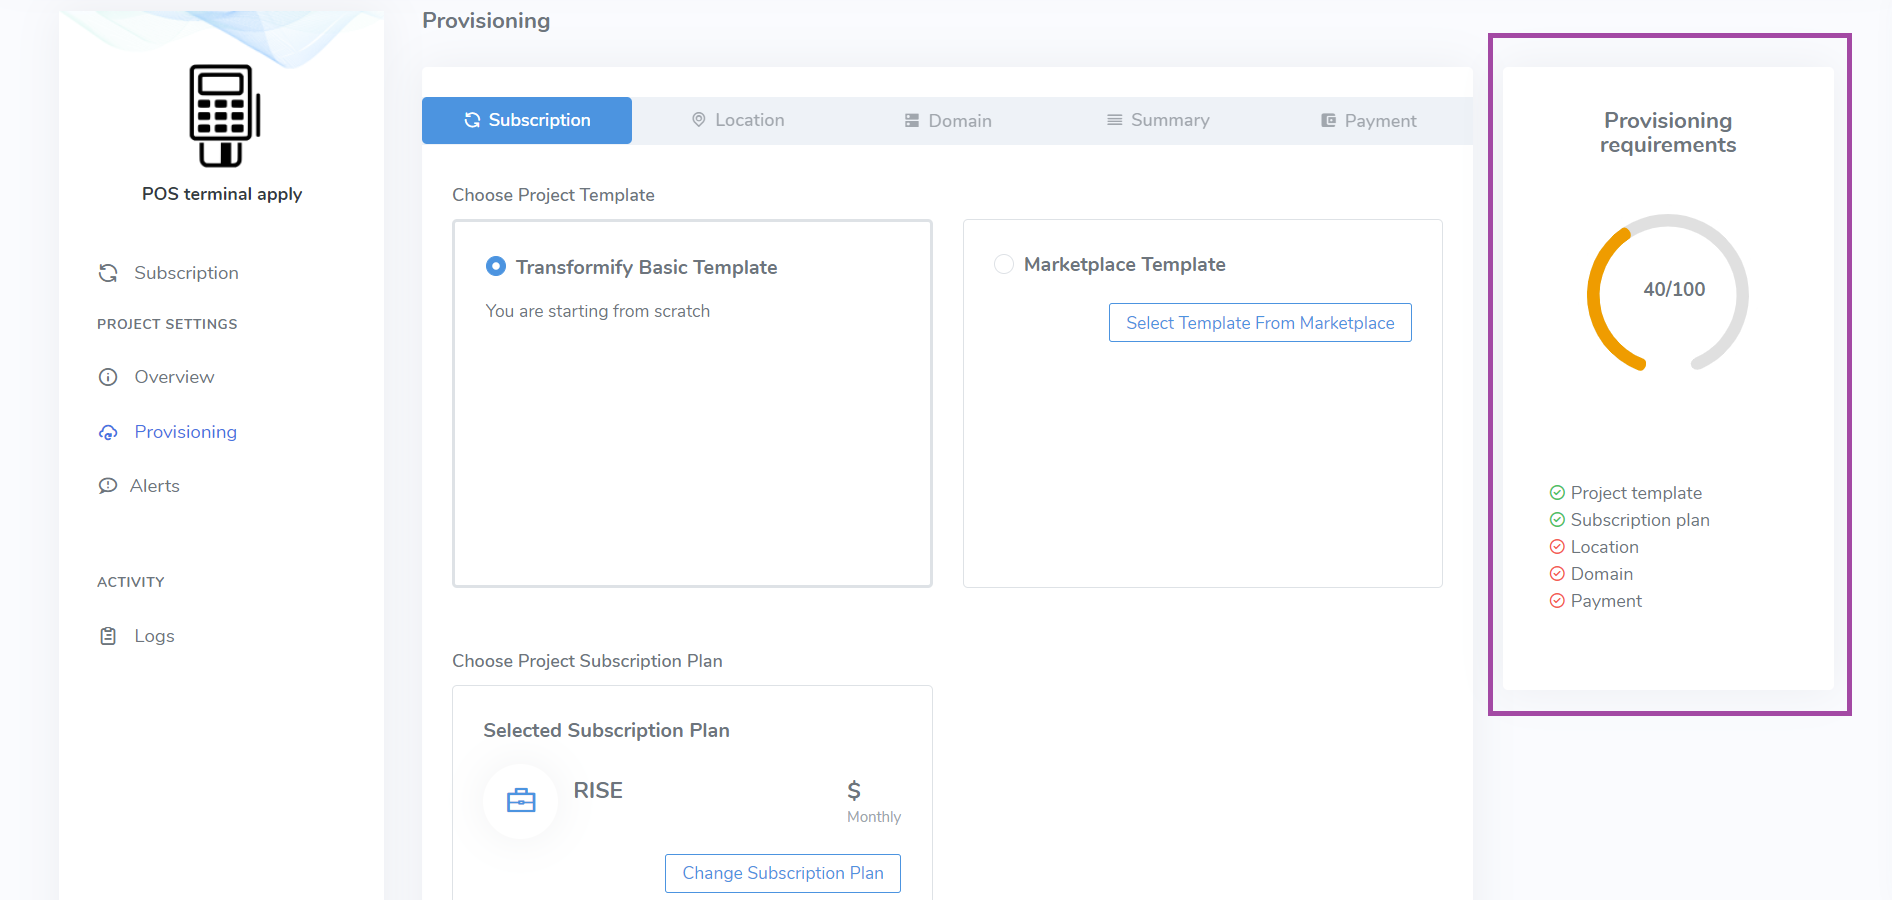
You've completed Step 1 from the Provisioning wizard. Click Next to continue.
Step 2: Location
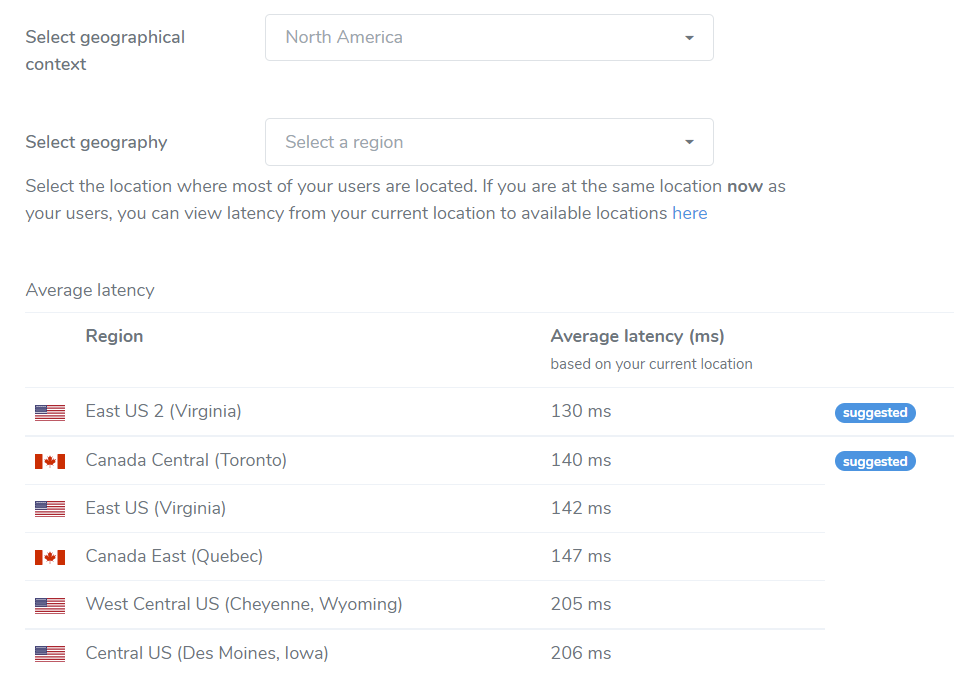
According to your answers from the questionnaire, we will guide, help, automatically filter, and display the possible data center locations to provision your Project. You are in control and have complete freedom to decide the provisioning location (data residency) within all available Azure regions worldwide.
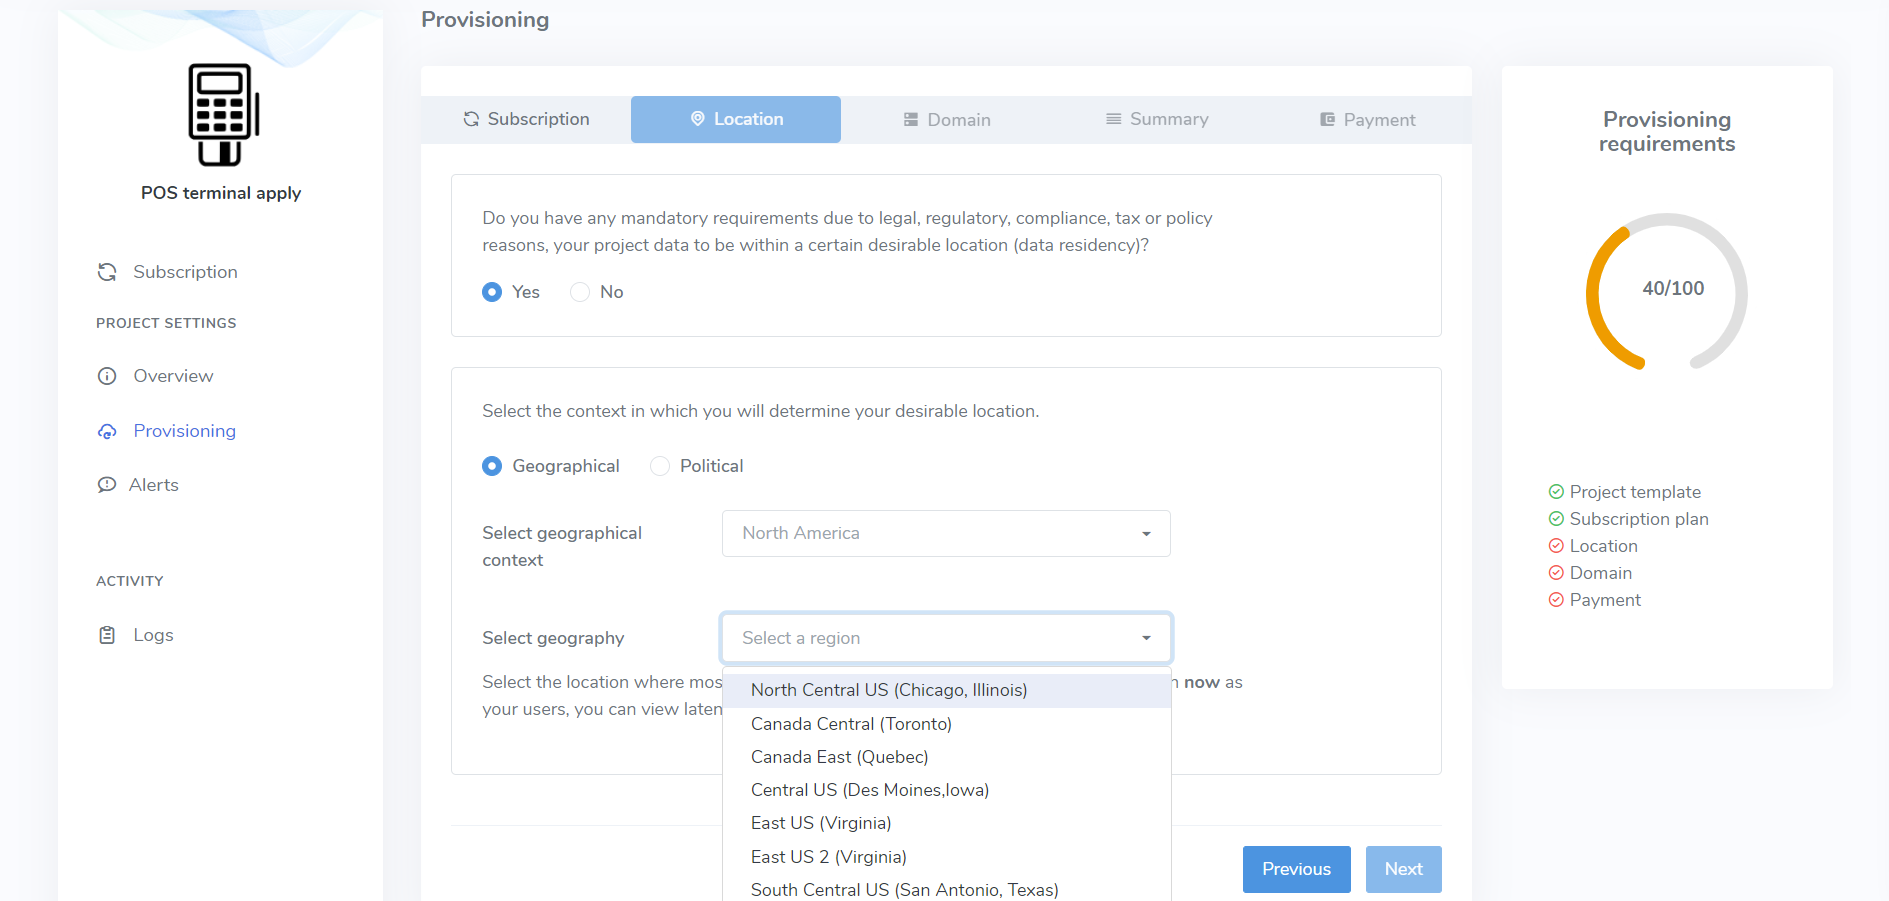
Below the geography you can preview real-time latency parameters in the context of your current location, if this further helps you determine the location.
If the organization Owner or Admin has enabled this organization policy, then you will have the option to select only from the allowed data center locations to provision your project. For more details on organization policies, read here.
You've completed Step 2 from the Provisioning wizard. Click Next to continue.
Step 3: Domain
Enter your desired prefix to the ts.transformify.digital domain name and click "Check availability". We will check if your platform domain name is unique or is already used within our transformify.digital domain.
Below, preview the autogenerated Web App and Identity Server URLs in staging and production environments.
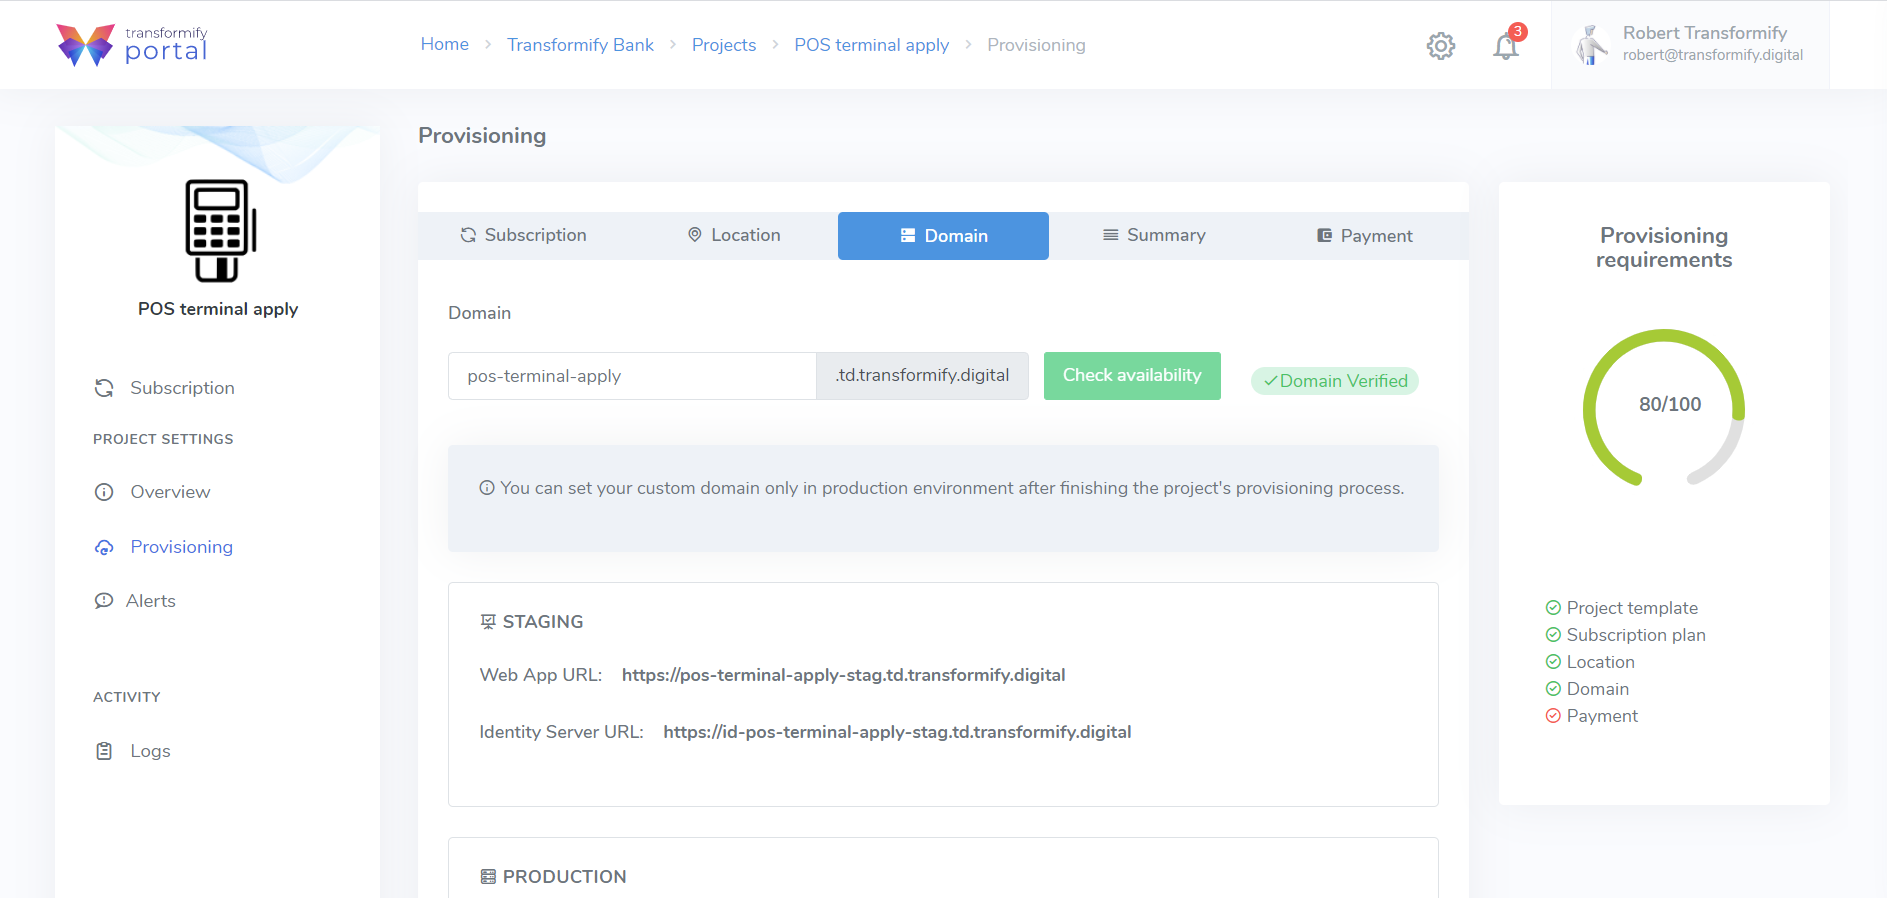
You can set a your custom domain only for the project's production environment, but only after the provisioning process of all your isolated environments is completed. For more details on this, read here.
You've completed Step 3 from the Provisioning wizard. Click Next to continue.
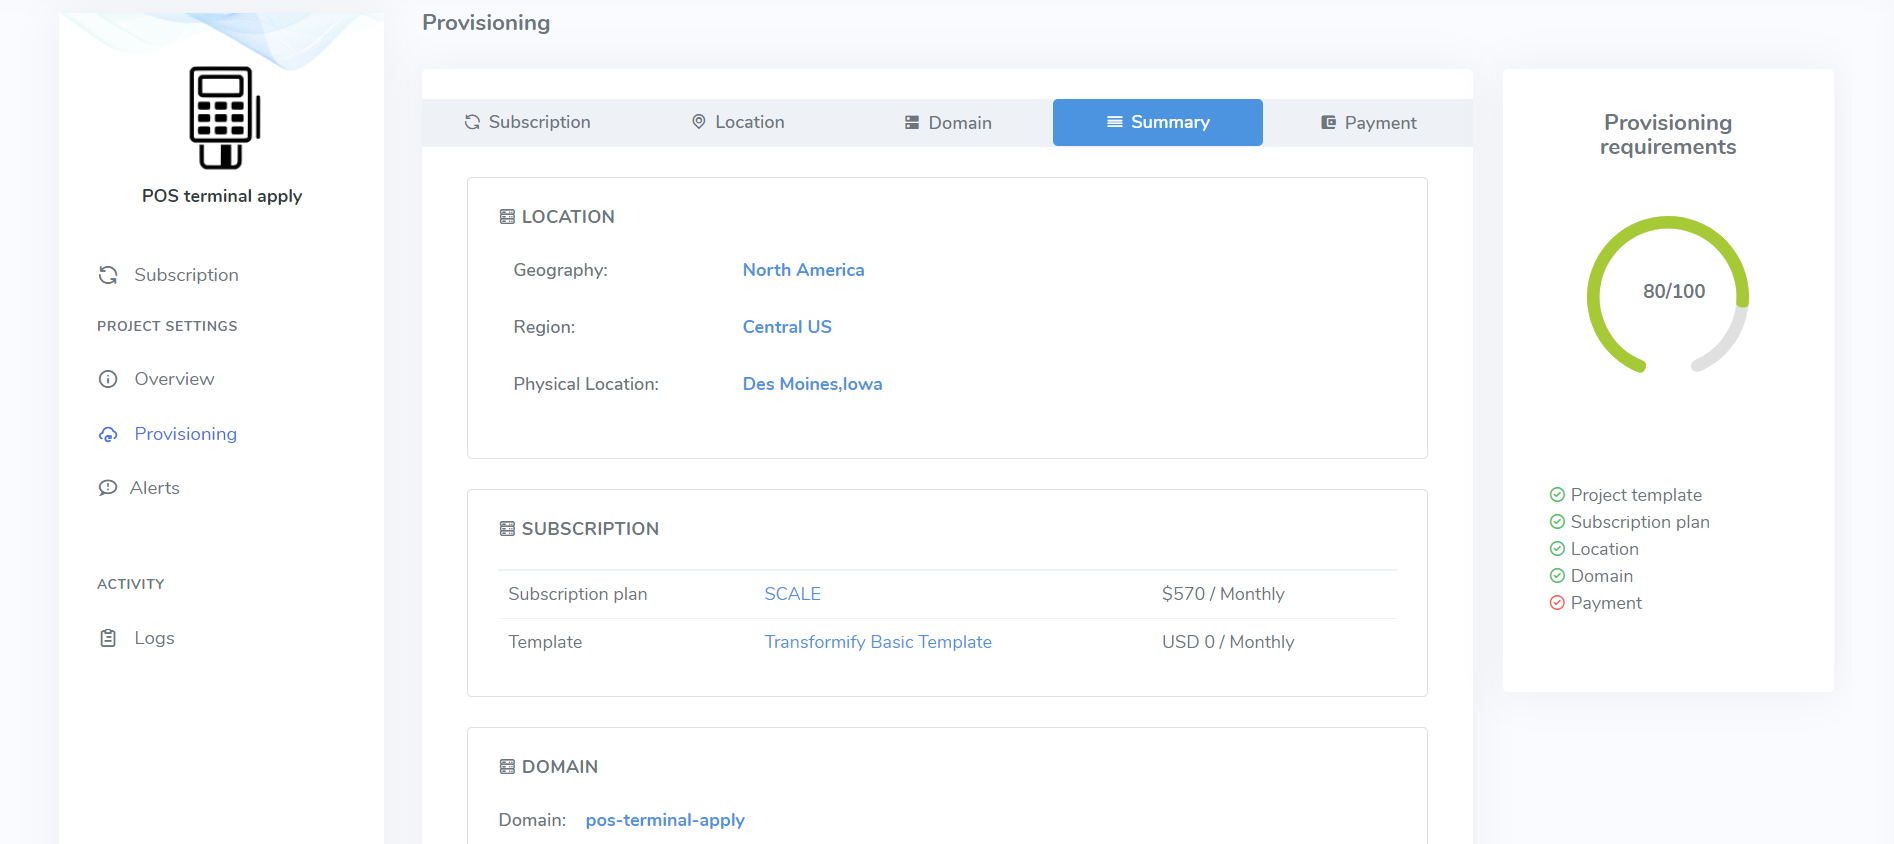
Step 4: Summary
You are almost finished. Before payment, please preview the summary of all your project parameters and settings until this point.
If you want to change something in any of the previous steps, just click directly on the tab menu where you want to make the changes or go back step-by-step by clicking the Previous button.
You've completed Step 4 from the Provisioning wizard. Click Next to continue.
Step 5: Payment
If everything looks fine and in place, proceed to payment.
Only credit card payments are available. We work hard on enabling other methods to provide wide palette of choices. Transformify clients that opt for the highest plan can pay via wire transfer.
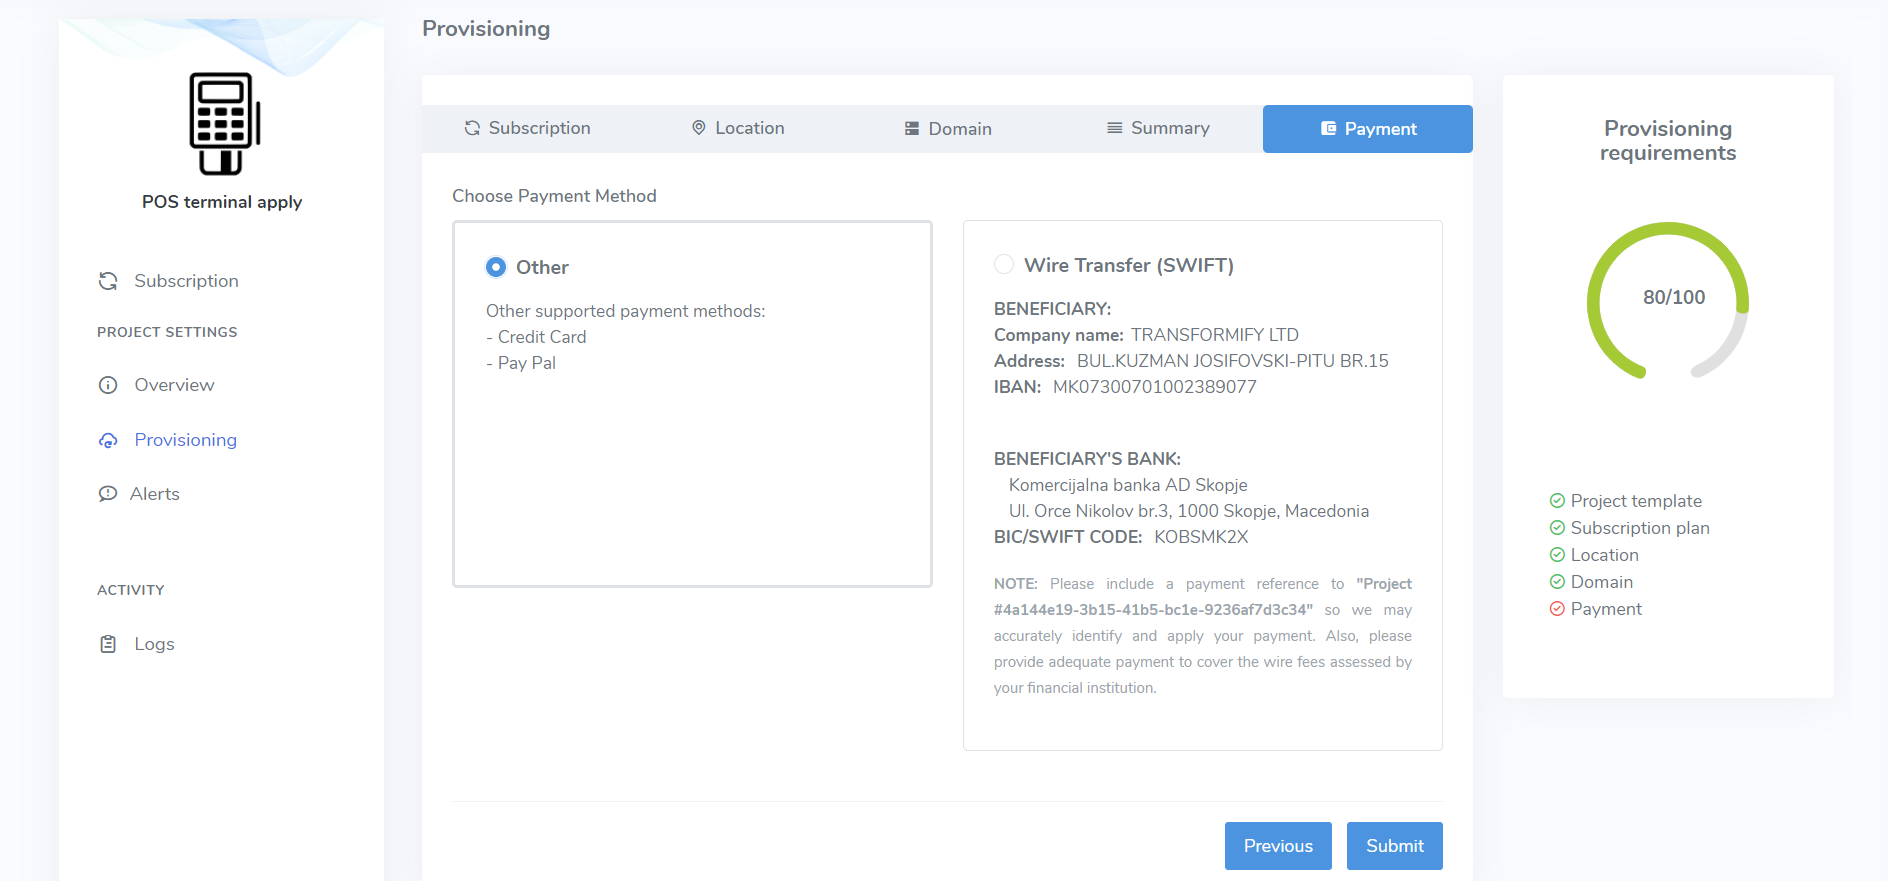
After selecting the payment method, click Submit to initiate the payment.
Payment step 1: Preview
The payment process starts with a preview of your purchasing items:
- Project subscription plan
- SaaS Solution (if you've chosen to purchase and subscribe to one from the Marketplace)
If you have received a coupon code for a discount from the SaaS Solution provider, please insert it in this field, to automatically calculate and display the discounted amount.
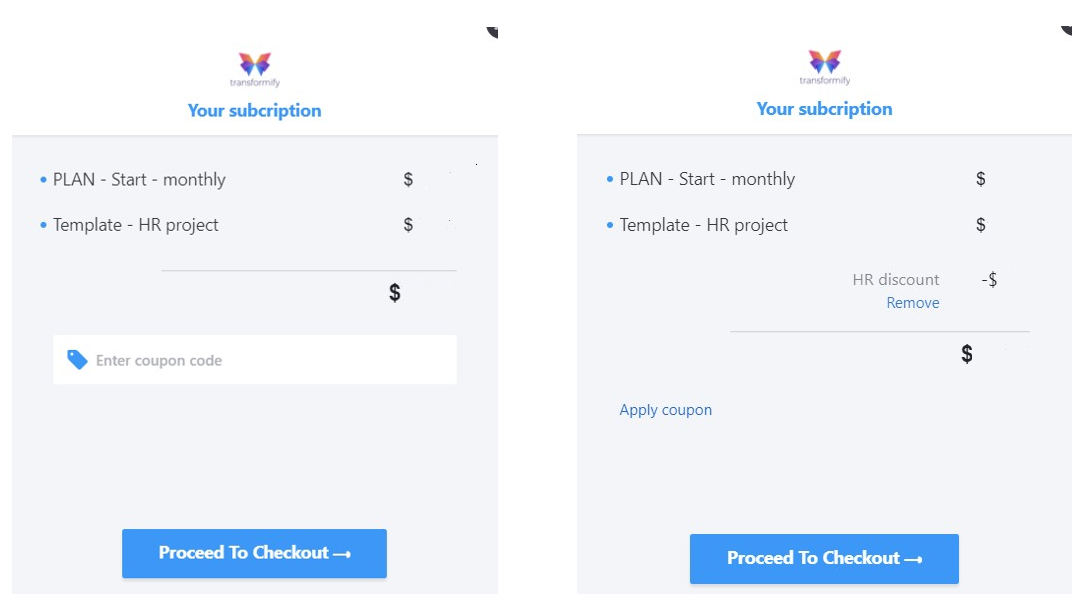
Click Proceed to Checkout to continue.
If you're paying for the project's subscription plan within an organization in which you already have a billing profile (meaning you have previously paid for other existing projects), you'll automatically skip payment steps 2 and 3, and will directly preview the summary displayed in payment step 4.
Otherwise, you'll need to fulfill all the requested information so we can create your new billing profile for this organization's project.
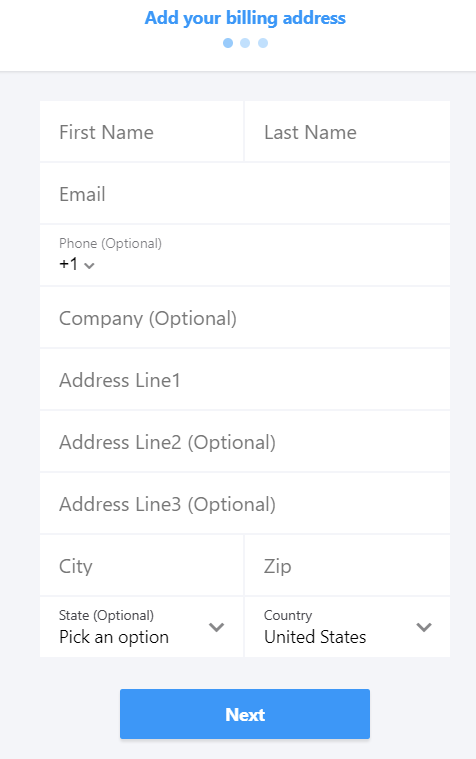
Payment step 2: Billing Address
Please enter your data related to billing address: First Name, Last Name, Email address, Phone number, Company (if you represent legal entity), Physical address, City, Zip code, State (if you're from the USA) and Country.
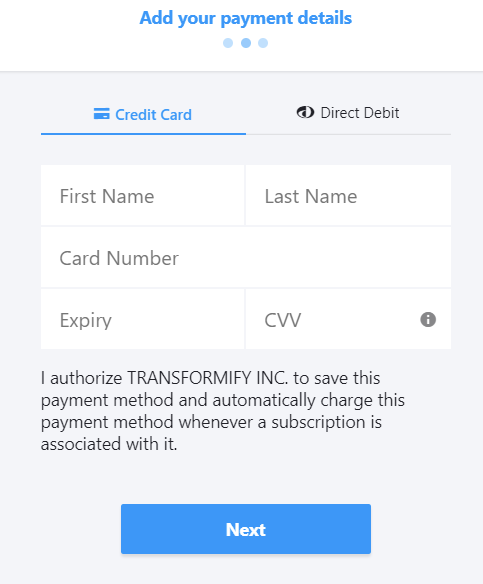
Payment step 3: Payment details
Please enter your payment details: First Name, Last Name, Card Number, Expiry date and CVV number.
Payment step 4: Summary preview of the subscription plan, billing, and payment details
Here, you can preview overall information you entered in the payment wizard. Edit and change each item's details if needed.
If you received a discount from our sales representative, please enter the Project Plan coupon code to add additional discount to your integrated subscription plan final price.
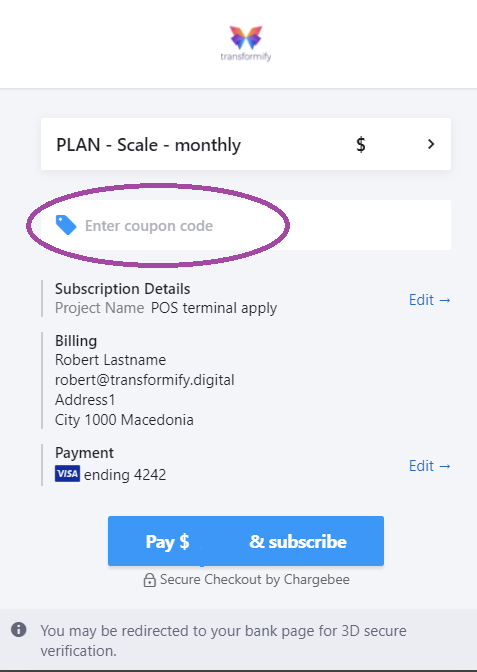
If everything is all set and done, click Pay & subscribe. Note thatyou may be redirected to your bank page for 3D secure verification. Click close to be redirected back to the Portal provisioning wizard section.
Finish and Start provisioning
After receiving successful status and confirmation for the transaction, click the button Start provisioning located below progress bar on the right-hand side.
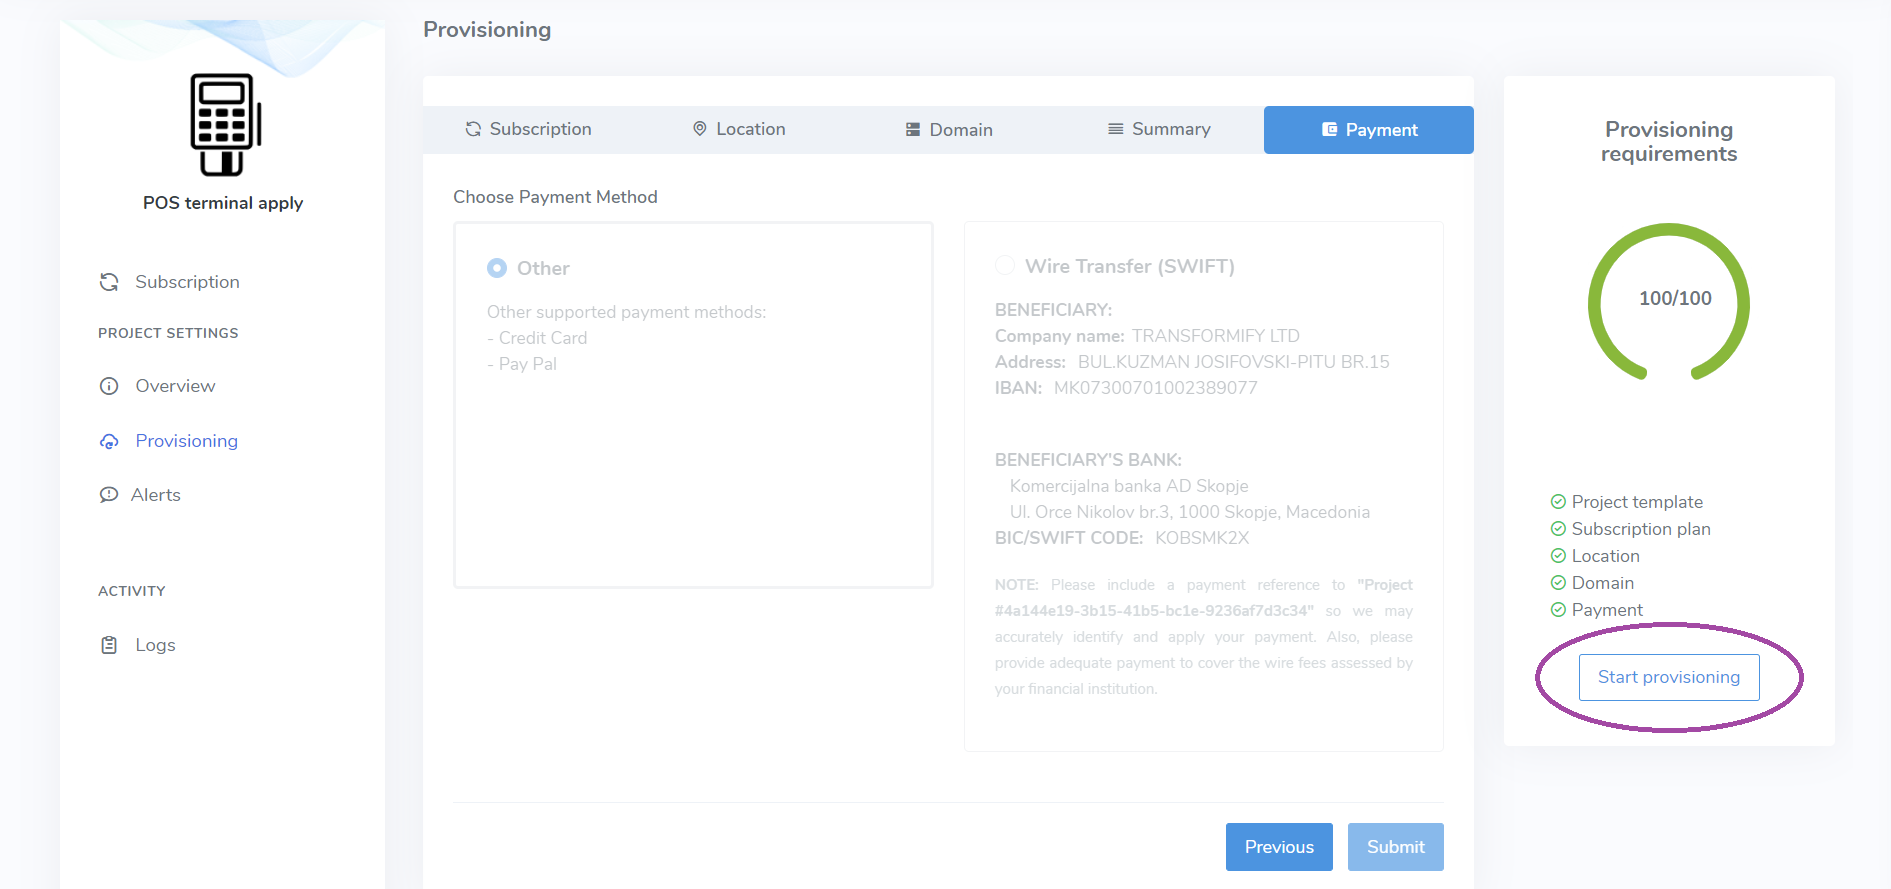
Please be patient for few minutes, while we create and configure all your project's cloud-native resources in the background.
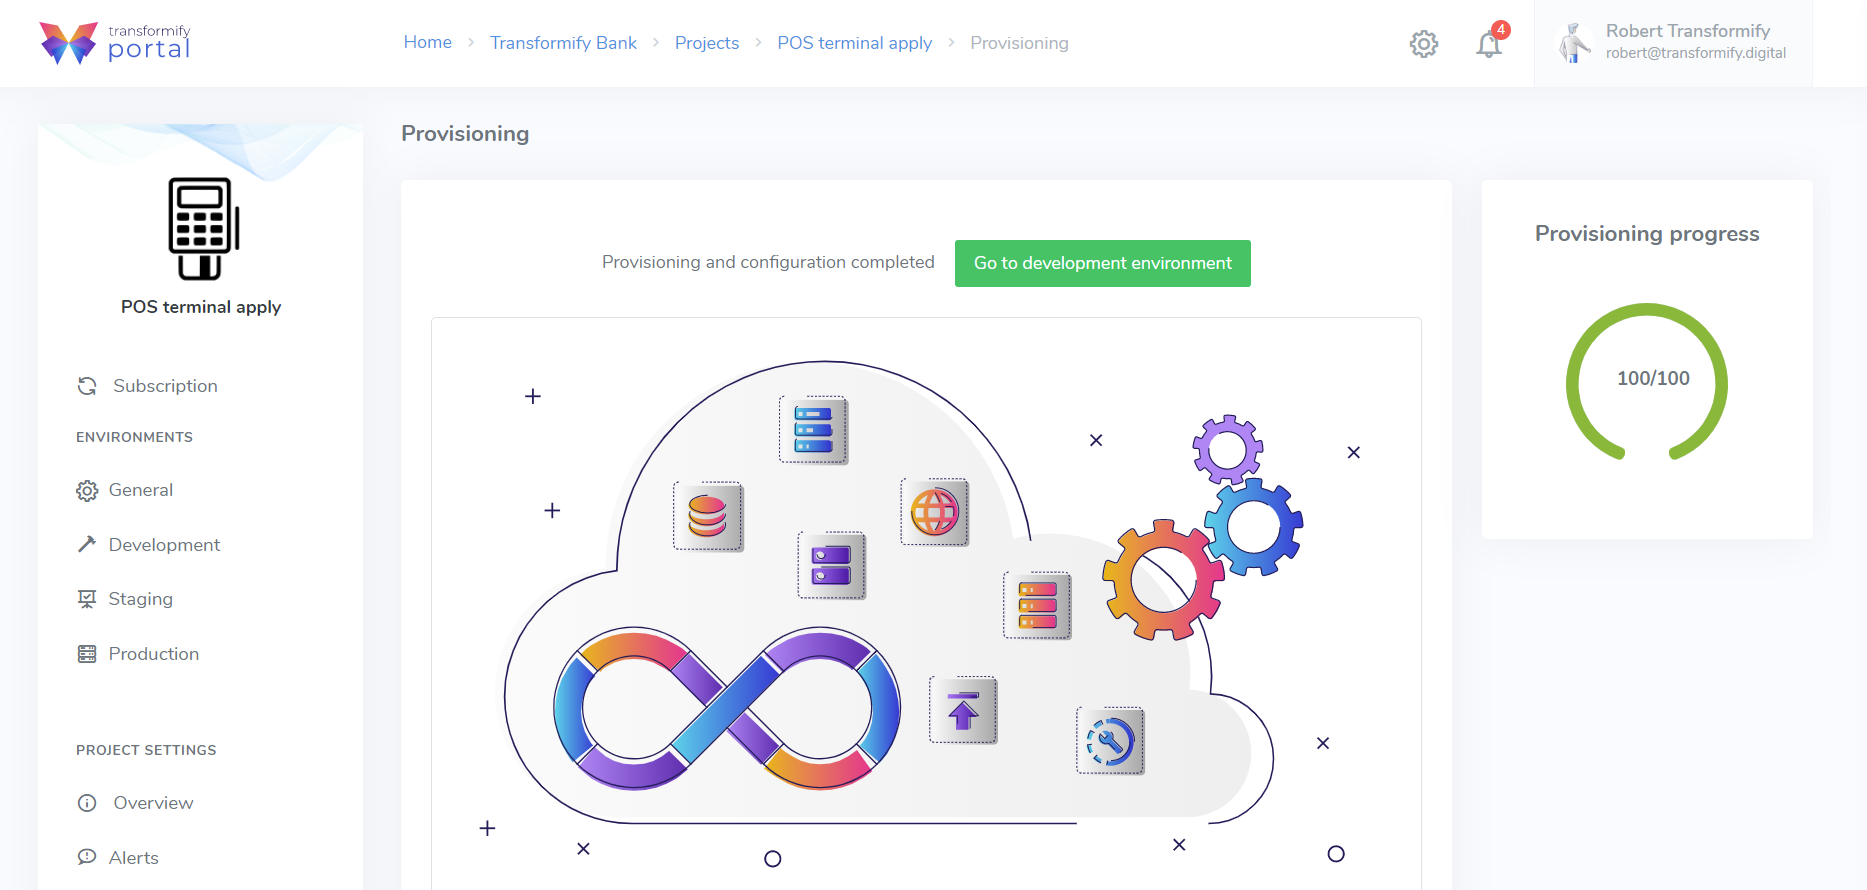
When the process finishes, click on the button Go to development environment.
Congratulations! Welcome to your Project 🙏